pfSense is an open source firewall with many features. This post covers the configuration of Cisco ISE as the RADIUS external identity source for administrative logins.
Software used:
- Cisco ISE 3.2 with patch 1
- pfSense Community Edition 2.6.0
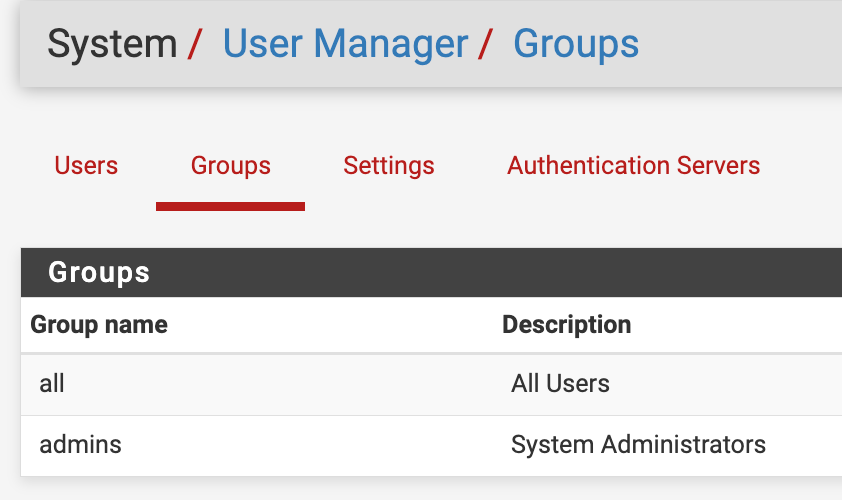
While the above specific software is used in this example, any version of Cisco ISE should work as this is standard RADIUS. It should also work with pfSense+. I’ll be assigning the default user group admins to successful authorizations. You can find the pfSense group names under System > User Manager > Groups.
Cisco ISE configuration
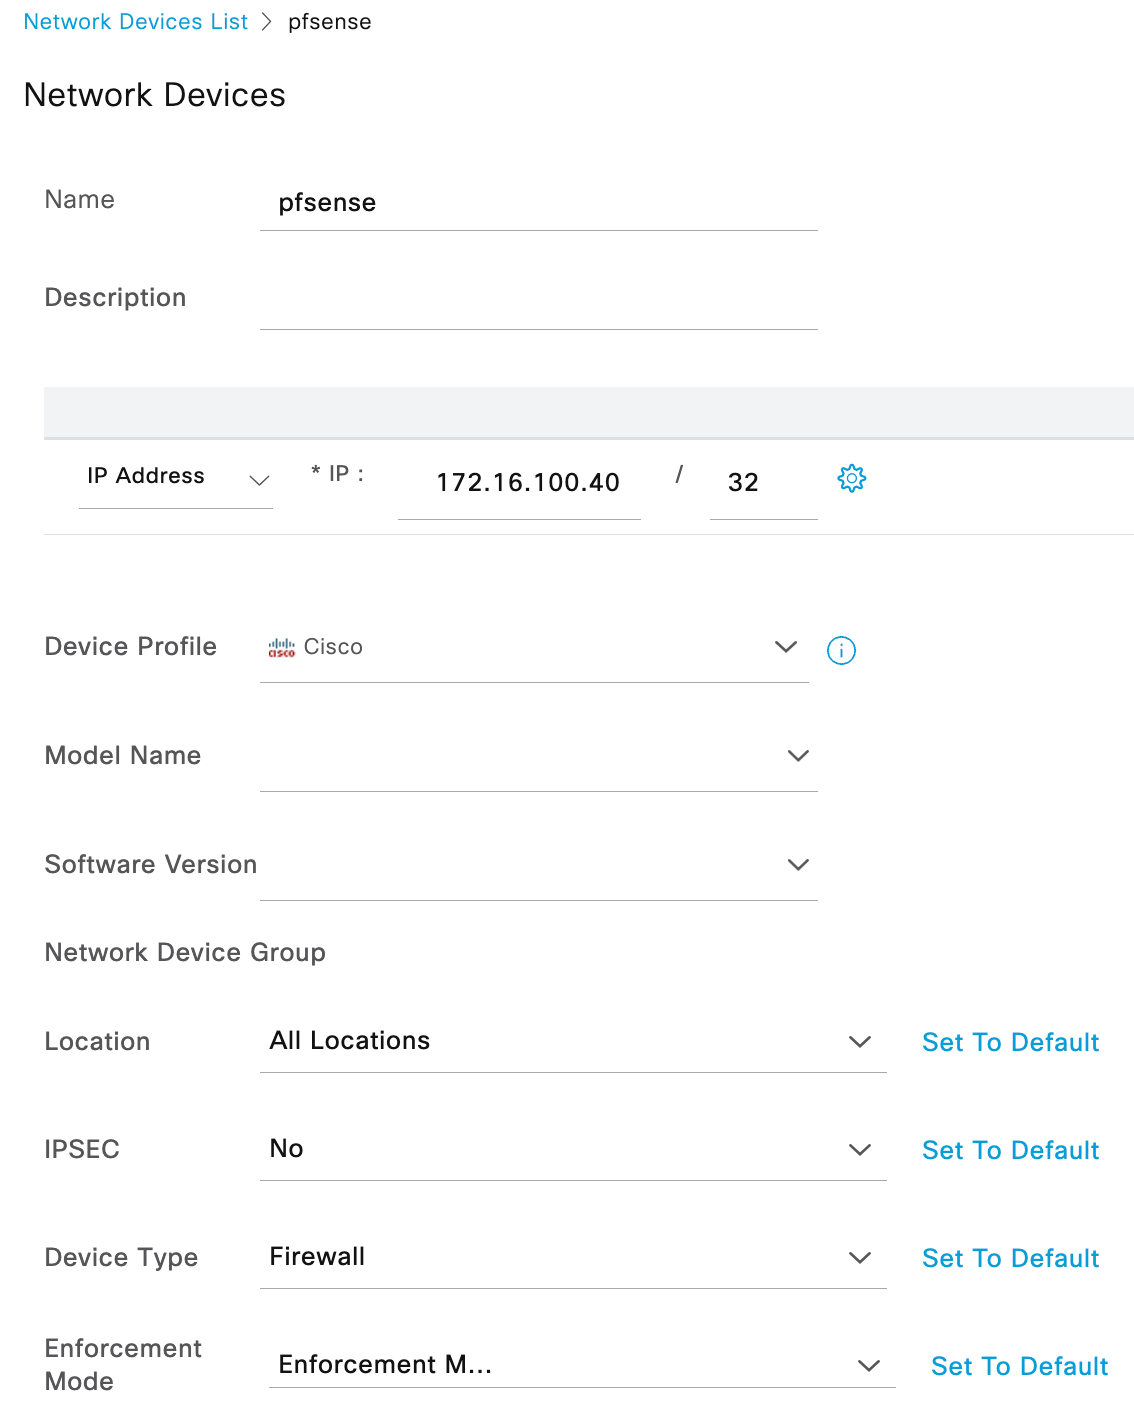
Start by adding the pfSense device as a network device and assigning to a network device group (Firewalls in this example).
- Browse to Administration > Network Resources > Network Devices and click Add.
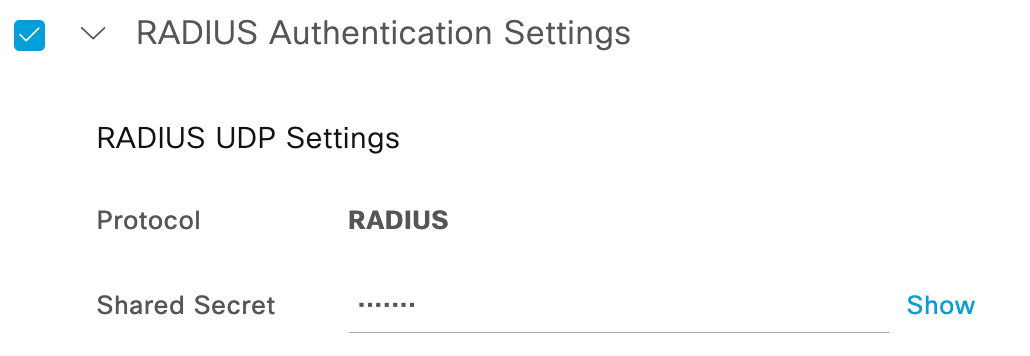
- Fill in a name, IP address (this example uses the LAN interface IP), assign it to a device type of Firewall (previously created device type under Administration > Network Resources > Network Device Groups), and assign a RADIUS shared secret under the RADIUS Authentication Settings. All other settings are left to the default.
- The device profile was left the default (Cisco) because there is nothing specific needed for this configuration such as Wired MAB attributes.
- The device profile was left the default (Cisco) because there is nothing specific needed for this configuration such as Wired MAB attributes.
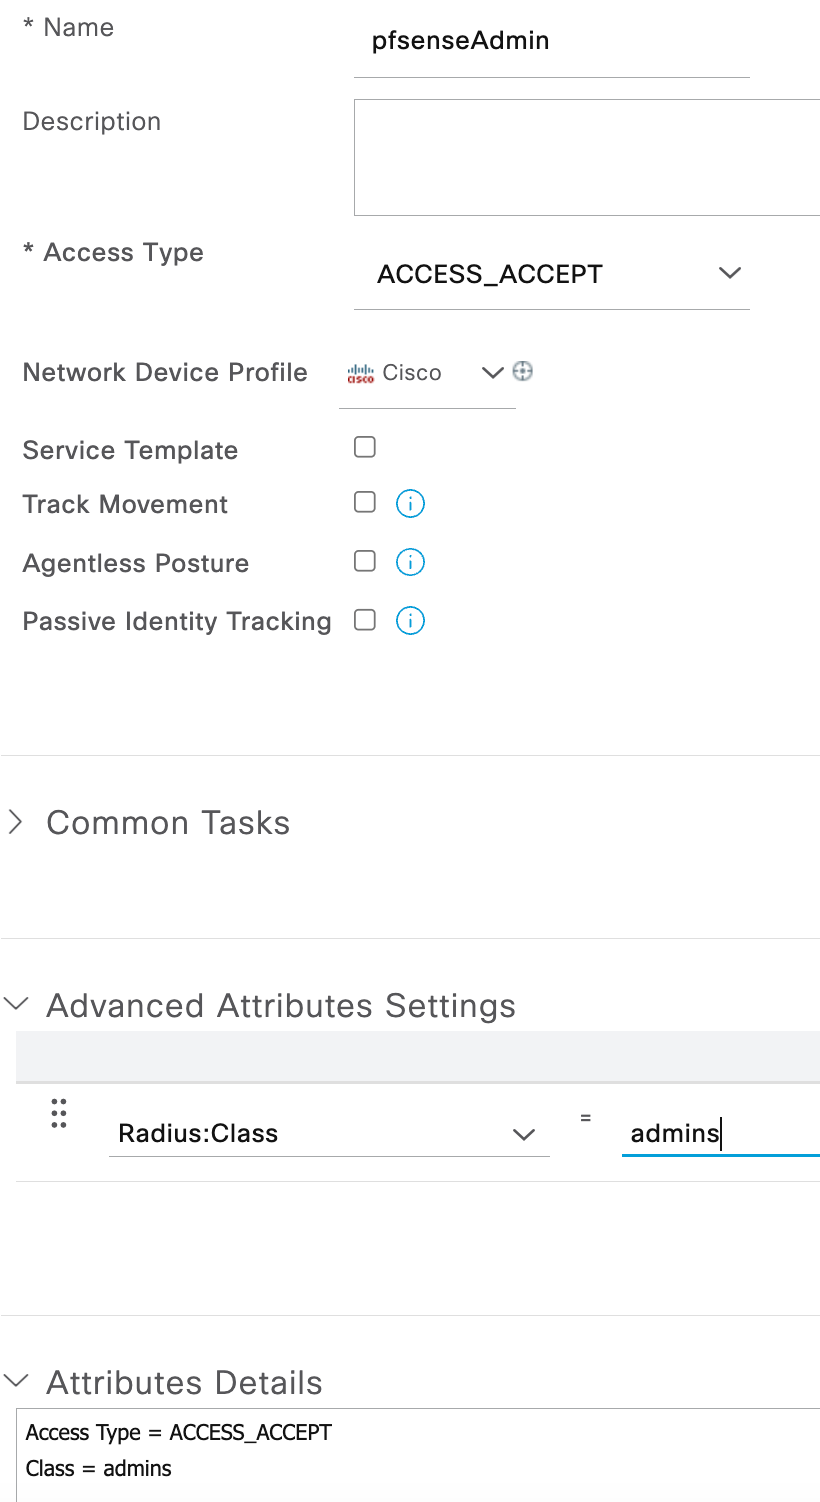
- Go to Policy > Policy Elements > Results > Authorization > Authorization Profiles and click Add to create an authorization profile to assign the admins group using a RADIUS class attribute.
- Assign a name (pfsenseAdmin in this example).
- Under Advanced Attributes Settings, choose RADIUS:Class and assign a value of admins.
- This can also be accomplished under Common Tasks by assigning the value admins to ASA VPN.
- Custom groups can be created in pfSense for various levels of access. The group name assigned can then be used in the RADIUS class that is sent by ISE.
- Go to Policy > Policy Sets to create the RADIUS policy set for performing the authentication/authorization.
- Create the policy set by assigning a name and configuring conditions.
- For conditions, I used the following as an AND compound condition:
- DEVICE: Device Type EQUALS All Device Types#Firewall
- RADIUS: Service-Type EQUALS Login

- I used the Default Network Access but a custom Allowed Protocols list can be used as long as it contains the proper protocol configured within the pfSense configuration.
- Expand the newly created policy set and configure the authentication and authorization rules.
- Authentication is set to utilize only the Active Directory join point (SecDemo.Local).

- Authorization is set with a condition to use a configured external group (Firewall Admins) from Active Directory. The result profile is the pfsenseAdmin profile that was created in step 3 above. Any user that authenticates but does not meet the AD group condition will be denied access.

- Authentication is set to utilize only the Active Directory join point (SecDemo.Local).
pfSense configuration
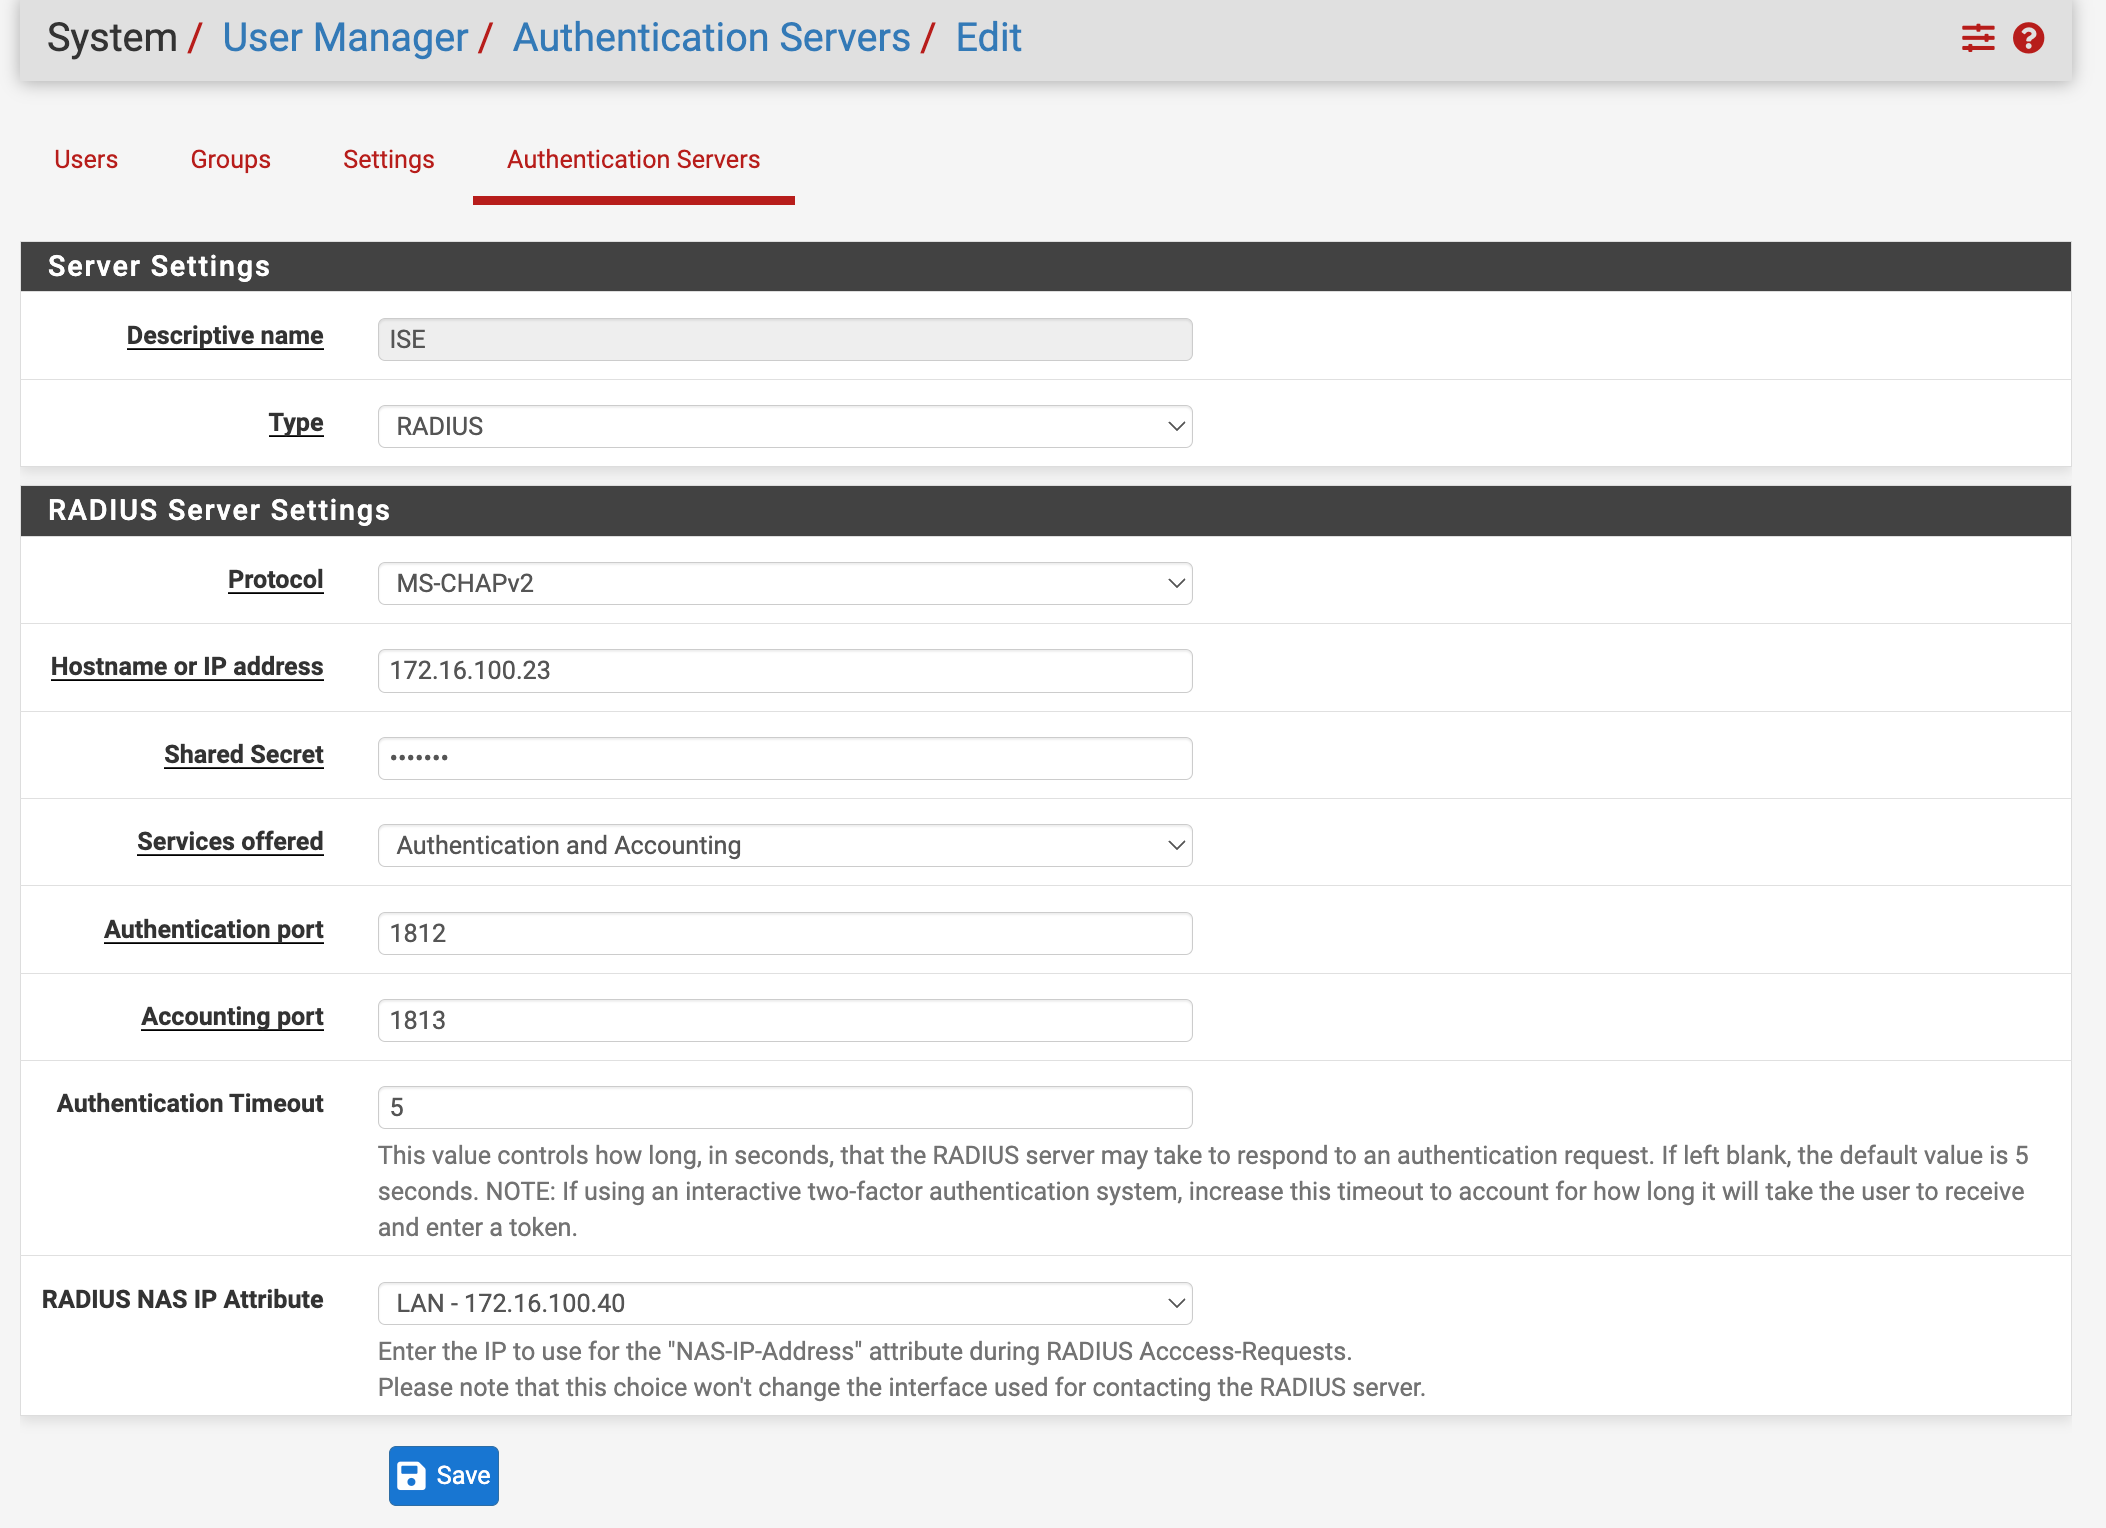
- Log into pfSense and go to System > User Manager > Authentication Servers. Click the Add+ button.
- Give the entry a descriptive name (ISE for this example).
- Set the Type to RADIUS.
- I used MS-CHAPv2 for the protocol but there are other options such as PAP.
- Configure the hostname or IP address of the ISE PSN.
- Fill in the shared secret that was assigned to the device when configured in ISE network devices.
- Services offered can be left the default Authentication and Accounting or changed to only Authentication.
- The authentication port is 1812.
- The default authentication timeout of 5 seconds should be sufficient but increase that in case you are using 2FA (eg Duo) or experience network latency that could cause authentications to timeout.
- The RADIUS NAS IP attribute drop down is set to the LAN interface since that is what we configured for the IP address of the device within ISE.
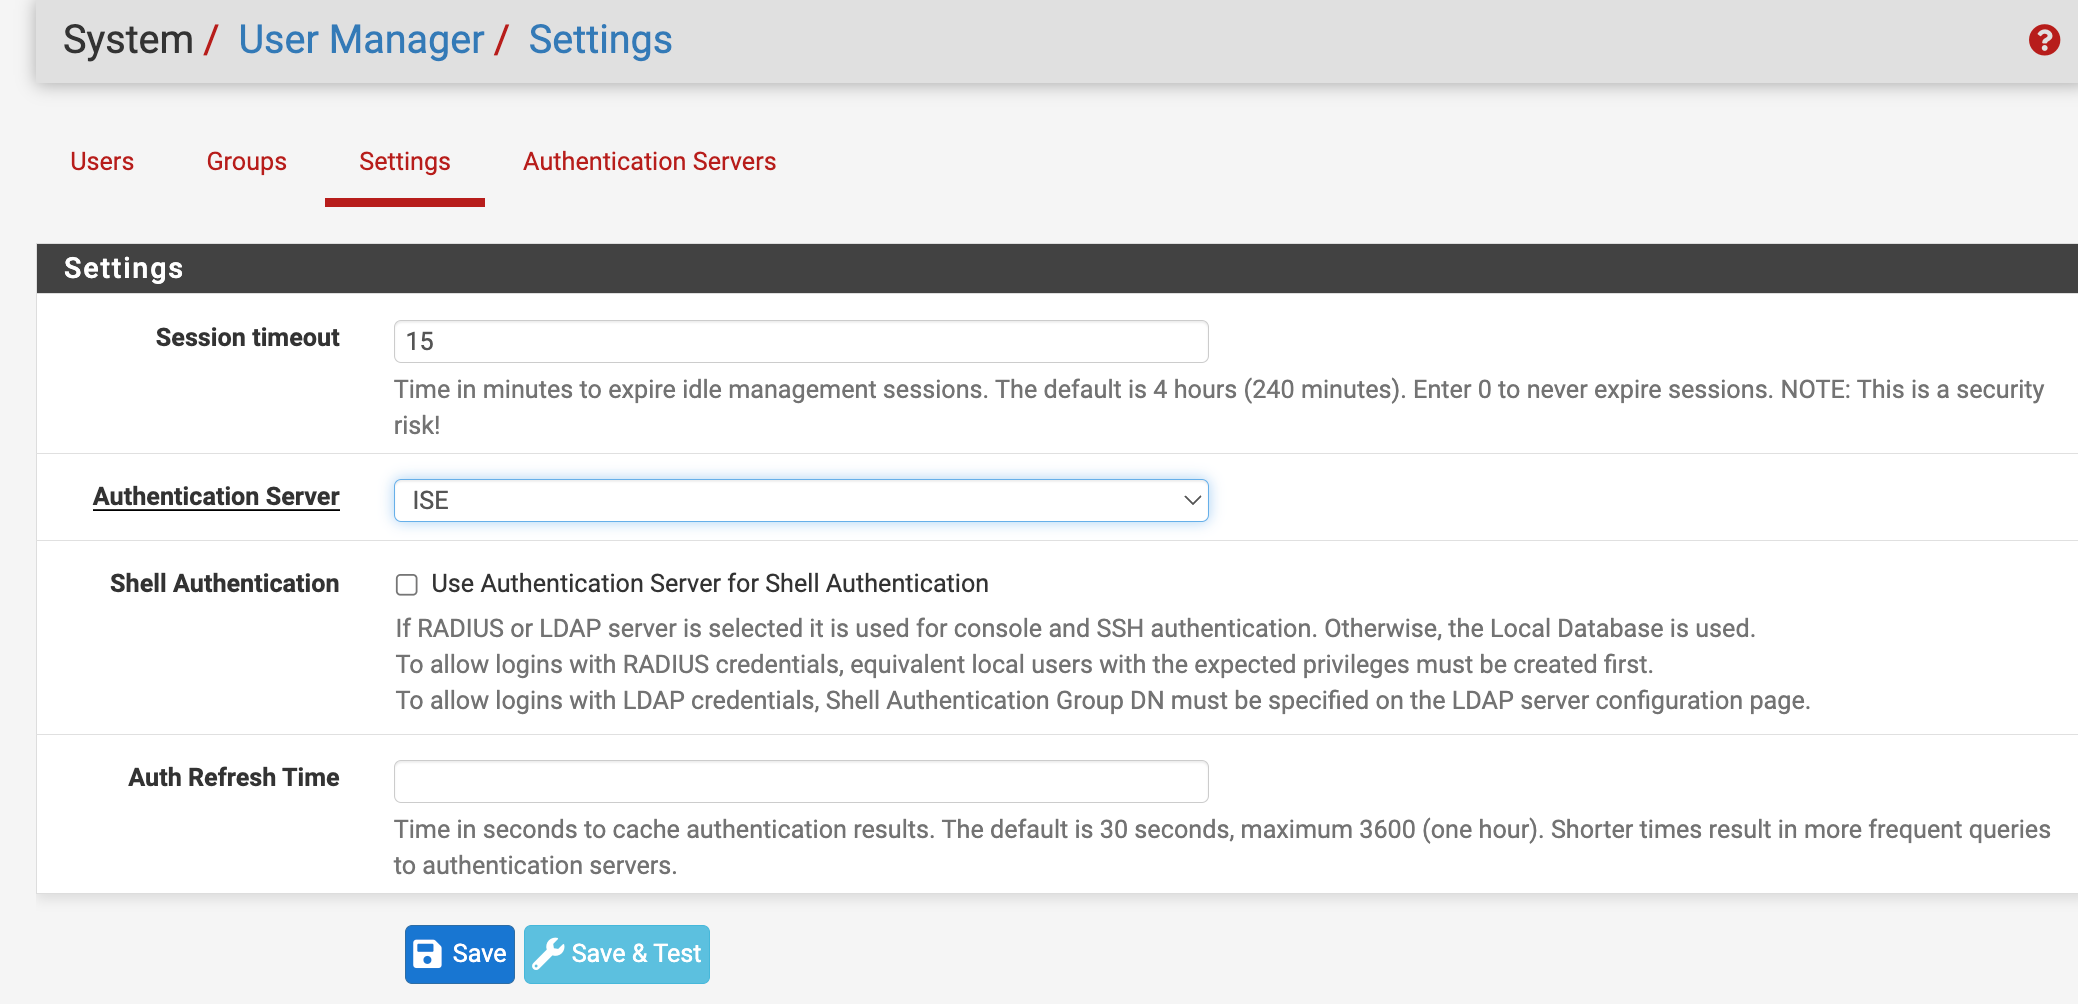
- Go to System > User Manager > Settings.
- Set the session timeout to an acceptable amount of minutes to expire an idle session. I used 15 minutes for this configuration.
- Change the authentication server from Local Database to ISE (or whatever you named the authentication server in step 1).
- If you want to use the ISE node for shell authentication, you can enable that function but a local user with the same name must be created and assigned the permissions for that to work.
Verification
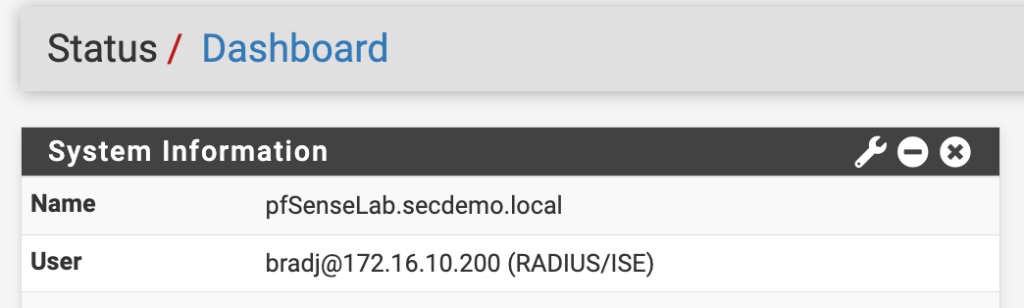
Now that everything is configured, log out of the pfSense interface and attempt to log into it with an AD account assigned to the proper group. A successful authentication/authorization should give your AD account full access to the pfSense admin GUI as well as showing the username next to User under System Information on the dashboard. The ISE RADIUS Live Logs should also show the correct authorization assignment.

Enabling external authentication does not prevent local user accounts from accessing the pfSense admin interface. The authentication will still be sent to ISE where it will fail but then it will be authenticated using the local database.
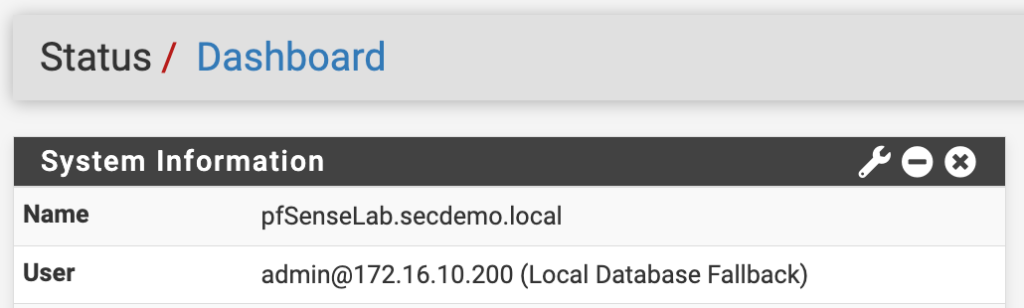

Notice in the second dashboard screenshot the user account shows it was authenticated using the Local Database Fallback because it failed to authenticate against ISE.
Nice article! Thank you for sharing it with me.